Windows Backup: How to Backup Windows 10
Windows 10 comes with integrated and convenient solutions for backing up your files. In this article, we'll explore these in-depth, as well as mention a few third-party solutions.
Miniaturized microprocessors: Aren't they great? Their proliferation has made everything from laptops to smartphones possible, putting an immense amount of computing power within a few pounds or even ounces of plastic, metals, and wires. They've also made it easy for you to spill water, coffee, or other beverages all over your keyboard; To leave these sophisticated devices behind in a taxi, bus, or train; And even to hear a loud series of beeps, followed by a black screen when you push the power button. Losing access to your laptop, whether owing to an internal issue, a hardware defect, or out of momentary neglect happens fast, but can be devastating, particularly if you've suddenly lost access to years of pictures, videos, records, login data, emails, and more. As if all of that wasn't enough: The trend in hacking and malware has seen the deployment of crypto-Trojans, popularly known as ransomware, which encrypts your hard drive, demanding a monetary payoff in exchange for returning access.
Thanks to all of the above, regularly backing up your data, preferably on a separate drive or storage devices, has become an absolute must, since it allows you to restore your files on a PC, or elsewhere. For Windows 10 users, there's good news: You don't need to rely on third-party software to do this since your operating system comes with three useful backup options, that only need to be activated and configured. In this article, we'll show you how to get the most out of them.
Option: System Restore
"System Restore" returns your system to an earlier point in time. This will undo, for example, the installation of faulty updates or programs which might have damaged your system.
The following are impacted by "System Restore":
Programs
Drivers
Significant changes to system settings
The following are not restored:
Individual files, such as images, documents, or music
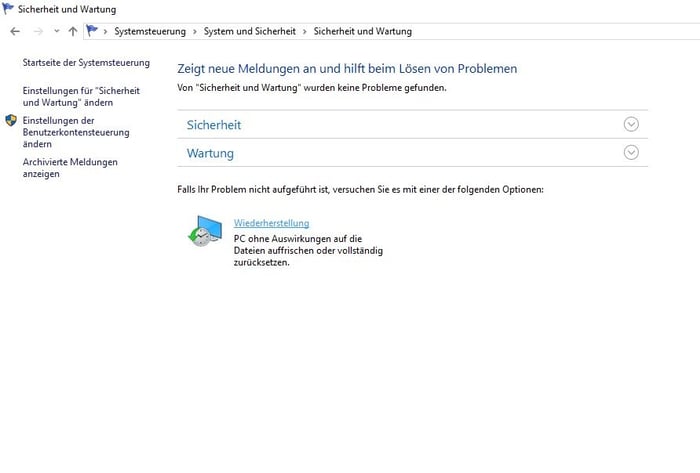
Restoring your system using this option makes sense if your laptop or PC suddenly starts to run slower, however, won't help in bringing any deleted or lost files 'back from the dead'.
To use System Restore in Windows 10, do the following:
Start – Search for "System Restore" in the Start menu – Select "Create a Restore Point" from the results – Click on System Properties
Note: If you haven't already configured your system to create restore points, the "System Restore" option will be greyed out. To configure restore points, click on "Configure" near the bottom of the task box and follow the steps below.

In the box that opens, under "Restore Settings", toggle system protection on, and then set how much disk space you'd like to devote to backups. Once finished, click on "Ok". Now, click on "Create". In the box that opens, you can enter a name for the restore point. Once finished, click again on "Create" and the restore point will be made, typically within a few minutes. This backup can be saved to an external hard drive or in Microsoft's OneDrive cloud storage.
Option: System Image
Using this approach, a copy of your entire system, including all folders and files is created. This option is particularly nifty for anyone who wants to start from scratch or transfer their work from an older to a newer PC or laptop.
To create a system image:
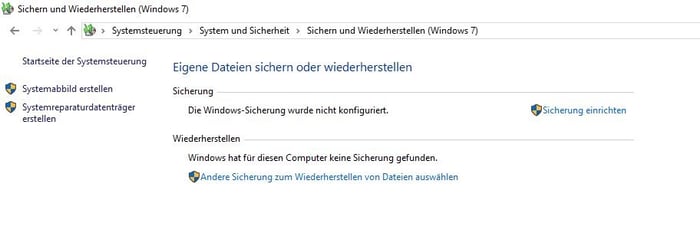
Settings – Update & Security - Backup - Go to Backup and Restore (Windows 7) – Create a System Image

Prior to the last step, you can connect your external hard drive to your PC or laptop, and save your backup to it.
It's not recommended to select the "Include a system image of drives" option since this will include your entire Windows installation, taking a few hours and requiring a significant amount of storage space. Additionally, the system image will quickly become outdated, owing to Windows's frequent updates. New programs that you might install are also not included in the system image.
By default, the backup is saved as "WindowsImageBackup".
We advise planning the regular creation of images using the "Schedule" submenu.
Option: File History
This provides a very useful means of securing specific folders since it allows you to individually select elements on your PC or laptop to be regularly backed up.
To configure File History:
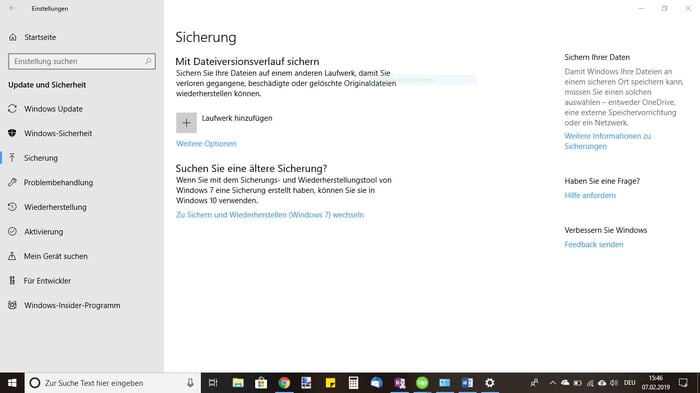
Settings – Update and Security – Backup

Here, you can exclude or add folders to the list of those set for backing up.
To access the backups, click on "More Options" and then on "Restore files from a current backup". The file can be found in the location where it was originally saved.
Alternative: Continuous Synchronization with OneDrive cloud storage
Microsoft's cloud storage service comes with Windows 10. In OneDrive folders, you can easily save files, which are then transferred to the service's cloud, allowing them to be accessed from anywhere.
But take care: When you delete a file stored in OneDrive from your computer or laptop, they are also removed from the cloud. Prior to this, they are transferred for 30 days to the OneDrive recycle bin, which can be accessed through OneDrive's website.
Alternative: Cloud Backup
To successfully backup your files, you'll need to save them somewhere else apart from your hard drive, such as an external hard drive, or NAS. Thanks to increased Internet bandwidths, the data cloud has also become an interesting and viable alternative for backing up data. You can find more information about this on our site.


