How To Start a Blog: Your Own Blog in 5 Steps


You're thinking about starting a blog, but feel unsure about where to begin or what you need? You’re in the right place.
We'll walk you through the process of creating a blog step-by-step — and reveal how you can make money as a blogger.


Creating Your Blog in 5 Steps
There are many ways to start a blog and lots of things to consider. We've broken down the journey into five key stages, highlighting your software options and what to keep in mind along the way.
Settle on a Topic and Niche
Creating a blog only makes sense if you have something to say. You probably do, or you wouldn’t be here. Still, it’s worth thinking about what topics you care about and what you want your blog to achieve.
You could treat your blog like a diary and write free-form. However, unless you're a literary genius, most people won't be interested, and your audience will likely be limited to friends and family (if even).
To reach a larger audience and run a professional blog, you need to choose your subject matter carefully. Start by asking yourself a few questions to define your niche and develop a concrete plan:
What topics are you passionate about?
There's no substitute for passion. Think about what topics you want to write about in detail, day in, day out. If you're passionate about something, it will be easier to get your readers excited about it, too.What are you an expert in?
Identify your strengths and use them to establish yourself as an authority in a particular area. Don’t limit yourself to formal education and degrees; sharing lived experiences gives you an authentic voice.What do you have that others don't?
Since plenty of blogs and online resources cover almost every topic, think about what could set your blog apart. What makes your perspective unique, and what can you provide that isn't available elsewhere?Who is your target audience?
Think about your potential readership. Consider what your main audience might expect from your blog posts and how you can best address their needs and interests.What topics have the potential to be profitable?
If you want to monetize your blog, consider the profitability of your topics. Research market trends to see which topics generate enough interest. Tools like Google Trends can help you analyze keyword search volumes.How do you want to make money with your blog?
Your monetization model can influence your content. For example, if you plan to use affiliate marketing, product reviews might be a good fit.
If you struggle to answer these questions, you might want to take a step back and rethink your basic idea and goals. Once you have a clear vision of your blog and the content you want to publish, you’re ready to move forward.
Choose the Right Blogging Platform
Every blog needs a home. First, select a blogging platform to bring your blog to life. This will provide both the technical foundation and the digital space (web hosting) for your blog.
You have several options, each with its own pros and cons:
Option 1: Publishing Platforms
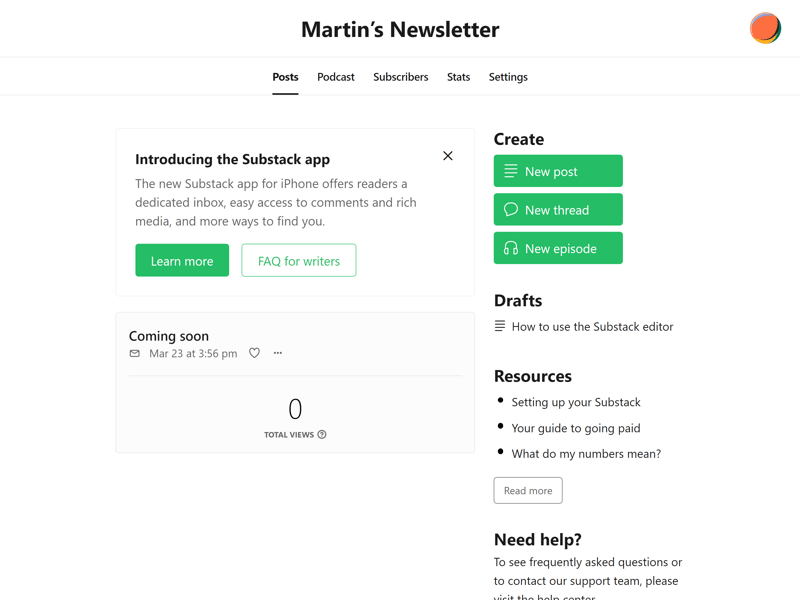
Substack is especially popular with independent journalists.
Because monetization features, such as paid subscriptions, are built into these platforms, they're popular with journalists who already have a following. They offer a way to earn money directly and immediately, 100% reader-funded.
Free to use
Many of these platforms are free and funded by commissions (Substack) or subscriptions (Medium). This means you can start your blog without any initial investment and focus on writing.Easy to use
Designed for beginners, these platforms let you focus on writing without having to worry about technical details.Monetization options
Built-in tools for paid subscriptions and sponsored content make it easy to earn money directly.
Limited customization
A Substack or Medium blog is not a unique website, so you can't personalize your blog much; design and feature options are restricted.You don't own your blog
You are subject to the platform's terms of service and could lose your content if your account is closed or the platform shuts down.Limited monetization options
You can monetize your writing on platforms like Substack and Medium, but you're dependent on the platform's monetization methods.Less SEO control
Limited SEO options might affect your blog's visibility on search engines.
Publishing platforms are a good choice if you:
want to start quickly and lack technical knowledge.
are looking for an easy way to monetize your content through built-in features like subscriptions.
already have an audience you can direct to your blog (e.g., via social media).
mainly care about writing and content, and less about customizing your web presence.
If you want to create your own blog and exercise full control over its design and features, consider the next two options.
If you decide to publish your blog on a platform, you can skip steps 3 and 4 and start writing blog posts right away.
Option 2: Website Builders
For more control over your blog's design, structure, features, and monetization options without dealing with technical aspects, website builders like Wix or Squarespace are great alternatives.
These platforms allow you to design a website using a visual editor, requiring no coding or web design knowledge.
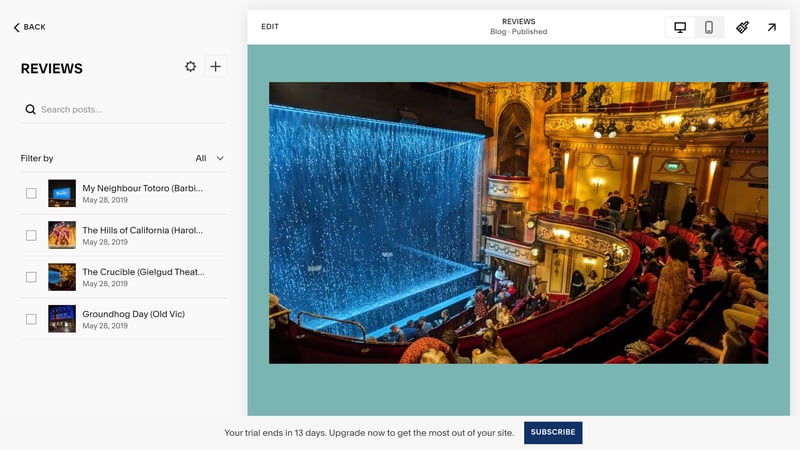
Website builders like Squarespace make creating blogs easy.
Website builders give you everything you need to design and run your blog in one place: You can design your site with a beginner-friendly, visual editor, write articles directly in the editor, and manage blog posts from a central dashboard.
Easy website design
Website builders are designed to make creating and managing a website as easy as possible. You don't need any technical knowledge to use them.Built-in blogging features
Almost all platforms have built-in blogging tools that make writing, organizing, and promoting blog posts effortless.More design control
With website builders, you can create a visually appealing, unique website. They offer a wide range of design templates and numerous tools for customizing your blog's look.Hosting and maintenance included
Services like hosting, maintenance, and security updates are included. You don't have to worry about the technical management of your site, as the provider handles it.
Limited customization options
While offering more flexibility than publishing platforms, website builders are less customizable than self-hosted websites.Dependence on the provider
Even as a paying subscriber, you're still dependent on the provider. If they raise prices, change terms, or suspend your account, you have little recourse.Technical drawbacks
Websites created with builders often can't match self-hosted, custom-coded sites in terms of SEO or page speed.
Website builders are a good choice for your blog if you:
have little or no knowledge of web design and programming, but still want to create a professional blog.
don't want to invest much time or resources in technical setup and maintenance.

If you need even more flexibility and control over technical aspects and would like extensive customization options, consider self-hosting your blog.
Option 3: Self-Hosted Blog
Self-hosting your blog gives you maximum control over all its aspects – from its technical infrastructure to its design. This option requires the most technical knowledge but offers the greatest flexibility and independence.
Self-hosting involves running a website on your own server. You’ll need:
- 1.
Webspace from a hosting provider like Bluehost, Hostinger, or GoDaddy
- 2.
A Content Management System (CMS) like WordPress, to help design your blog's site and manage its content.
Full technical control
You control all technical aspects, from choosing a host to configuring your server and setting up security.Extensive customization options
You have access to your website's source code and much greater control over your blog's look and functionality compared to website builders.Huge selection of plugins
Platforms like WordPress offer a vast selection of plugins that cover almost every feature you could think of.No dependence on third parties
Your blog truly belongs to you, minimizing the risk of content restriction or account suspension.
More effort
You must handle everything yourself, from web hosting to SSL protection, and regular maintenance is necessary.Technical knowledge required
Coding and web design skills aren't a must, but you do need more understanding of web technologies than with website builders.
Self-hosted blogs are a good choice if you:
want complete freedom in determining your blog's design and functionality, and are willing to tackle the accompanying technical challenges.
want a long-term solution that won't make you dependent on a platform provider's decisions.
If you decide to self-host, the next step is choosing a web hosting provider. Options vary in performance, cost, and support.
If you opt for WordPress – which we highly recommend because it's the most popular blogging platform for a reason – you can also use special WordPress hosting plans tailored to its requirements.
For more information on web hosting and detailed reviews of hosting providers, check out our comprehensive guide here:

Name Your Blog and Secure a Domain
What do The Points Guy, Pinch of Yum, and Money With Katie have in common? They all have unique, recognizable names that quickly reveal what their blogs are about.
A great name isn't a prerequisite for a successful blog – many bloggers are simply known by their legal names – but it can significantly help with branding.
It's crucial to find a name for which a domain is available. Your website's domain is its unique name and part of its web address. For example, a book store called Books4Ever might have a domain www.books4ever-publishing.com.
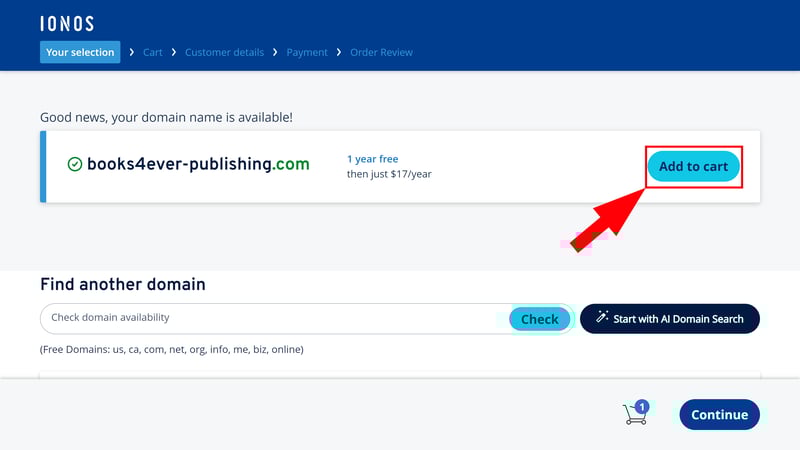
Many good domain names are already taken, so you might need to experiment to find one that suits you.
Once you've chosen a platform, picked a name, and registered a domain, you can start setting up your blog.
Design Your Blog
First impressions matter. Good writing isn't enough; your articles need to look appealing, too. Invest some time in designing your blog's website, homepage, and layout. How you do this depends on the blog platform you chose:
Designing a Blog With a Website Builder
Website builders make it easy to design a blog with pre-made templates, AI tools, and drag-and-drop editors. Each platform works a bit differently, but you always need to follow these steps:
Step 1: Choose a template
First, pick a template that will serve as the visual framework for your site. It provides a starting point that you can further customize with the editor's design tools and fill with content.
Most providers group their templates into categories. If you choose a blog template, you won't have to manually add a blog to it. We recommend picking a template that closely matches your vision. This saves time and effort because you only need to make minor adjustments in the editor and fill it with your content.
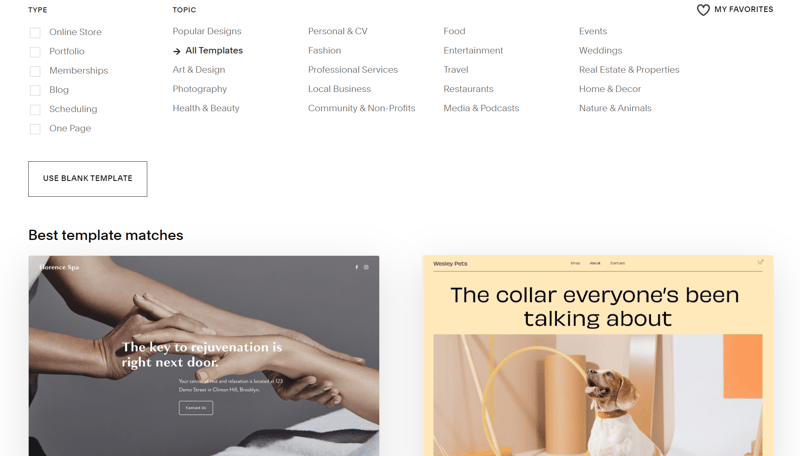
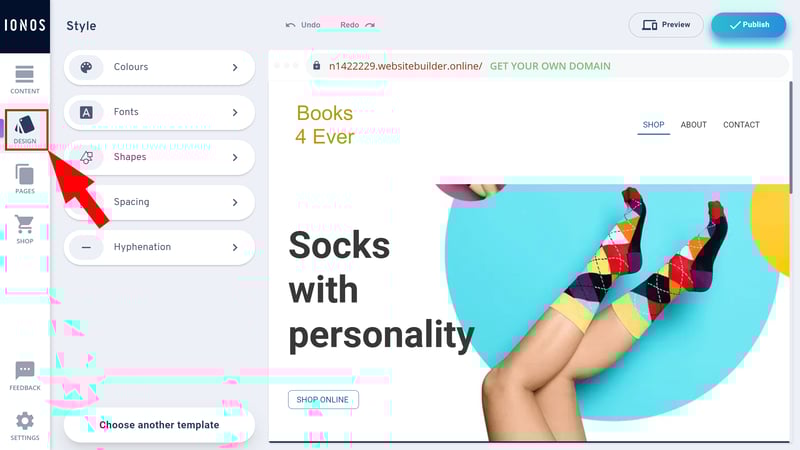
Choose a suitable blog template.
Step 2: Customize the design
Next, customize the global design of your blog's website. This includes general design settings like its color scheme and fonts, which are automatically applied to all of your site's pages.
Customize the design to your liking.
Step 3: Set up pages & menus
Decide how you want your blog to be structured. Do you need just a homepage that lists all your blog posts, or do you want a more extensive website with multiple sections?
Use page settings to create new pages and configure their position and visibility in the navigation menu. If your chosen template lacks a blog, you'll need to add a blog page to house your posts.
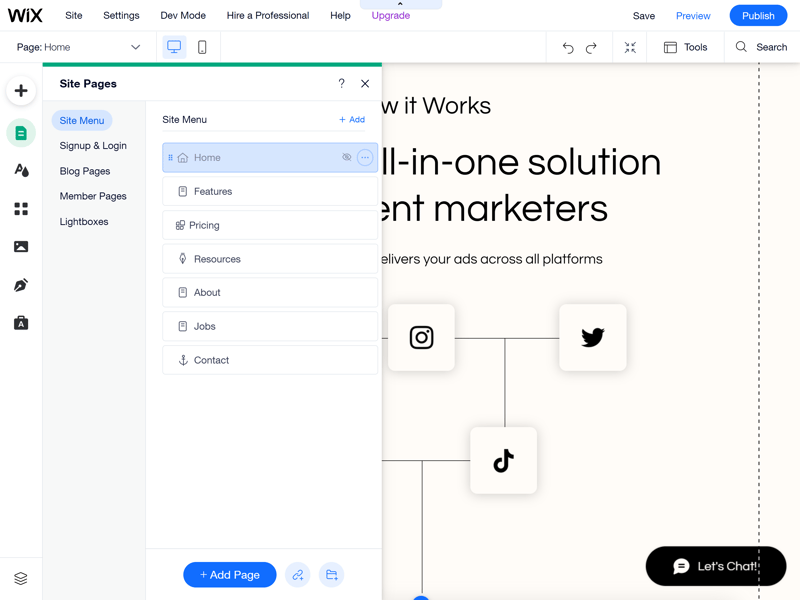
Define your blog website's structure.
With website builders, managing your blogs and blog posts is usually straightforward. Most platforms come with centralized blogging dashboards that allow you to view, edit, and schedule your posts.
Step 4: Customize content in the editor
Once you're satisfied with your design and have added the pages you want, focus on your website's static content. This includes all text, images, and elements that aren't blog posts, like your “About Me” section or homepage.
This is where your website builder's visual editor comes in. Use it to directly edit your content in a kind of live preview of your website's frontend, using pre-configured content blocks, page templates and many other design tools.
Edit your blog website's content.
Step 5: Publish your blog
Once you're satisfied, publish your blog. This is usually done with a click of a (hard-to-miss) button. If you haven't selected a domain yet, this is also a good time to connect it to your blog.
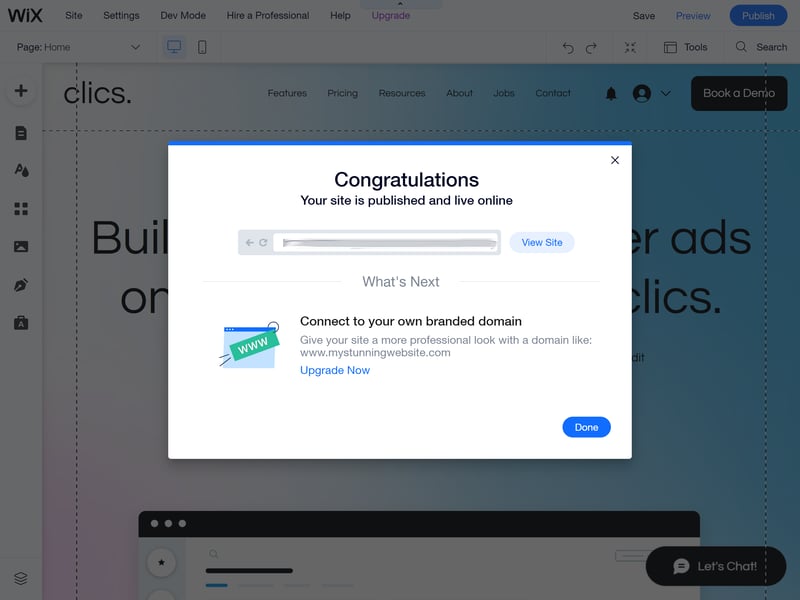
Now you just need to publish your blog.
Of course, each website builder has a unique interface and works a bit differently. We've prepared detailed step-by-step tutorials for some of the most popular website builders for you.


Designing a Self-Hosted Blog (WordPress)
If you host your blog yourself, things are a bit more complicated — but still manageable, don't worry. Here's how to do it with WordPress:
Step 1: Install WordPress
First, you need to install WordPress on your web space. Most hosting providers make this step easy and offer one-click installations that practically automate the initial setup.
With Kinsta for example, simply click “Create Site” under “WordPress Site” to start the process. Once you specify a site title, admin name, password, and desired server location, Kinsta takes care of the rest. Other hosting services make it just as easy.
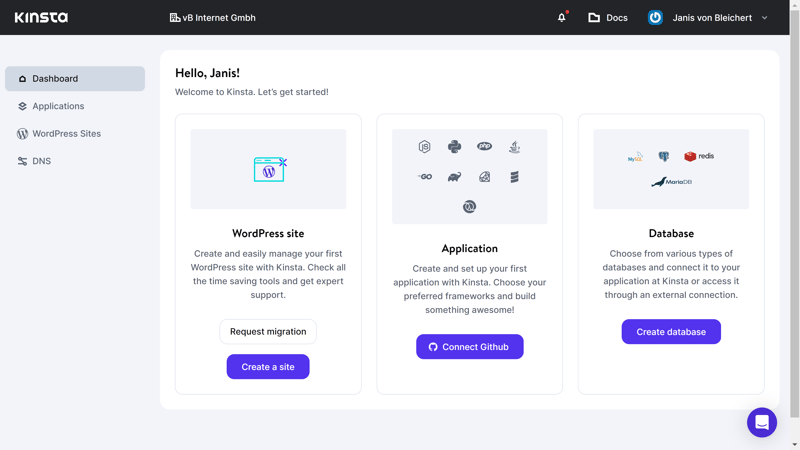
It's easy to install a WordPress instance in Kinsta.
Step 2: Configure basic settings
If you host your blog yourself, there are more technical aspects to consider. Hosting services usually make configuration easy, with many settings pre-configured. However, ensure you check the following:
Check your PHP version: Make sure you are using the latest PHP version for optimal performance and security.
Enable an SSL certificate: Activate an SSL certificate to ensure secure connections. Many hosting services offer free SSL certificates that you can activate in your hosting dashboard.
Check your domain's settings: Verify that your domain is set up correctly and points to your WordPress installation.
Configure backups: Configure automatic WordPress backups to prevent data loss.
Optimize performance settings: Enable server-side caching and other performance optimizations to improve your website's loading times.
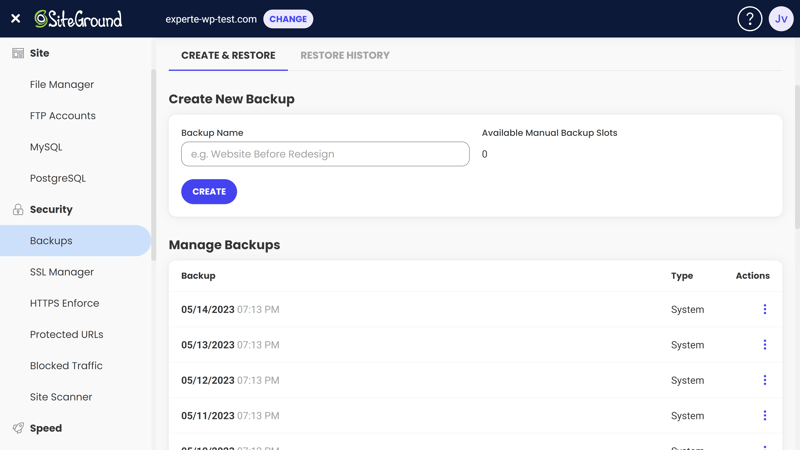
SiteGround makes backup management simple.
Step 3: Find & install a theme
WordPress themes provide the basis for your website's design. Navigate to Design > Themes in the WordPress admin area. You can now choose the right theme from thousands of available options. These are sorted by type, features, and layout.

Browse available themes.
When you find a theme you like, you can open a live preview. After you've made your decision, click “Install” and then activate the theme in the list under Design > Themes to start using it.
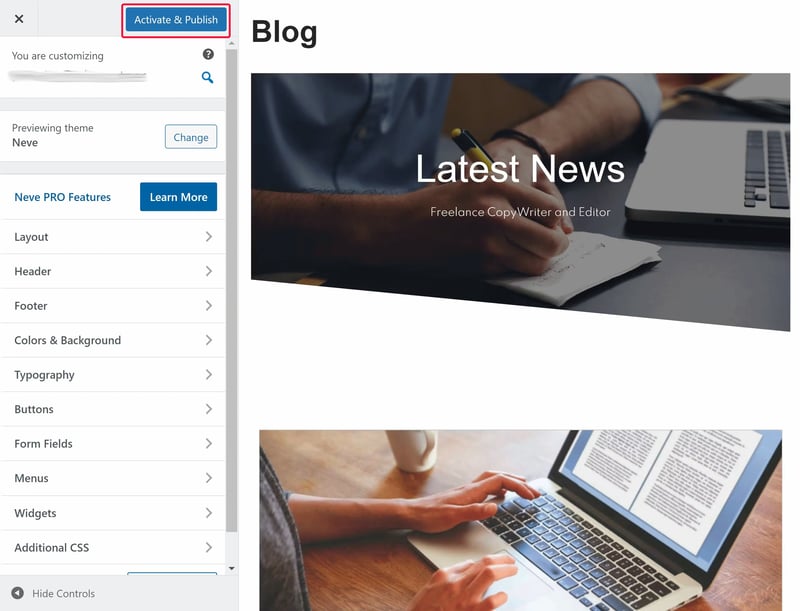
Activate the selected theme.
Step 4: Customize your theme's design
Use the WordPress Customizer (Design > Customizer) to configure your color scheme, fonts, and layout options, applying them globally to personalize your website.
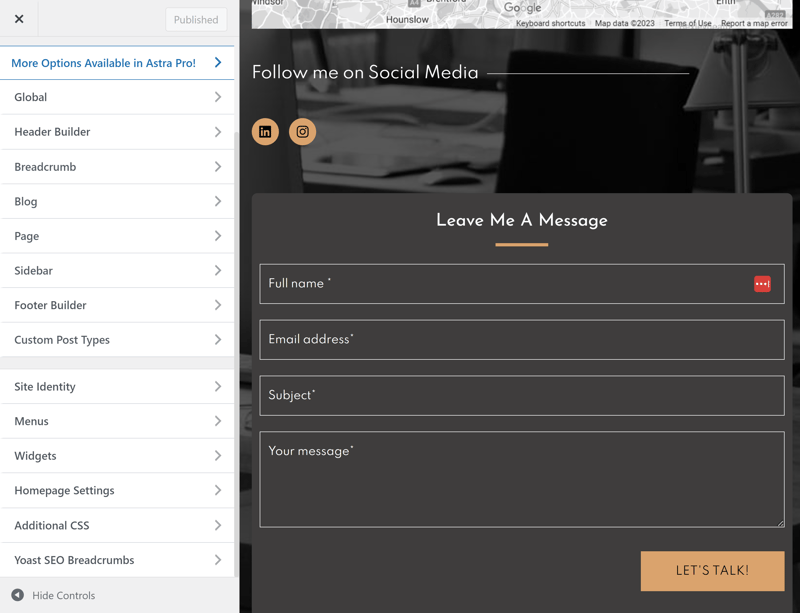
Customize your theme's design.
Step 5: Install plugins
Plugins are one of WordPress's biggest advantages since they allow you to expand your website's functionality.
To browse the plugin marketplace, go to Plugins > Add New. Here, you can search for plugins by name or functionality. Popular plugins include SEO tools like Yoast or All in One SEO, performance enhancers like W3 Total Cache or WP Rocket, and even builder plugins like Elementor or Oxygen, which combine the flexibility of WordPress with the ease-of-use of a drag-and-drop editor.
To install a plugin, find one you like, click “Install Now” and then activate it. This will add new features and options to your WordPress dashboard.
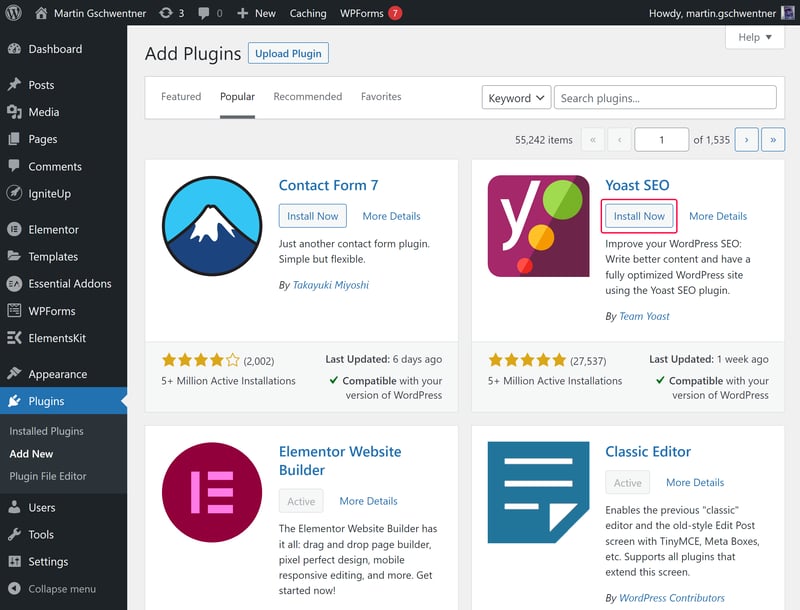
WordPress is known for its plugins.
Step 6: Create content
Your website is empty at first — you'll change that with the Gutenberg Editor, WordPress's default editor. Use it to visually design and arrange content with special tools and content blocks.
Every WordPress website consists of static pages – like a homepage or the “About Me” section – and dynamic posts, which are displayed in reverse chronological order or sorted into categories. The latter are ideal for blog posts.
Start by focusing on static pages, since they define your blog's basic structure. Create all the pages you need in the Pages section. If you want to present all blog posts on the homepage, one page is enough. Otherwise, you should create at least a homepage and a blog page.
Add new pages.
When you add a new page, you're taken to the Gutenberg Editor. There you'll edit your page with content blocks, just like in a website builder:
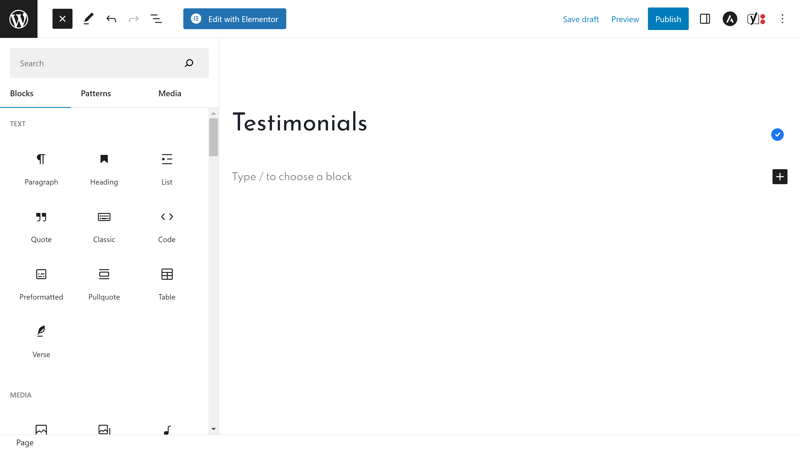
Edit your pages with the Gutenberg Editor.
With WordPress, it's best to organize your blog using posts and a dedicated blog page. Here's how to do it:
- 1.
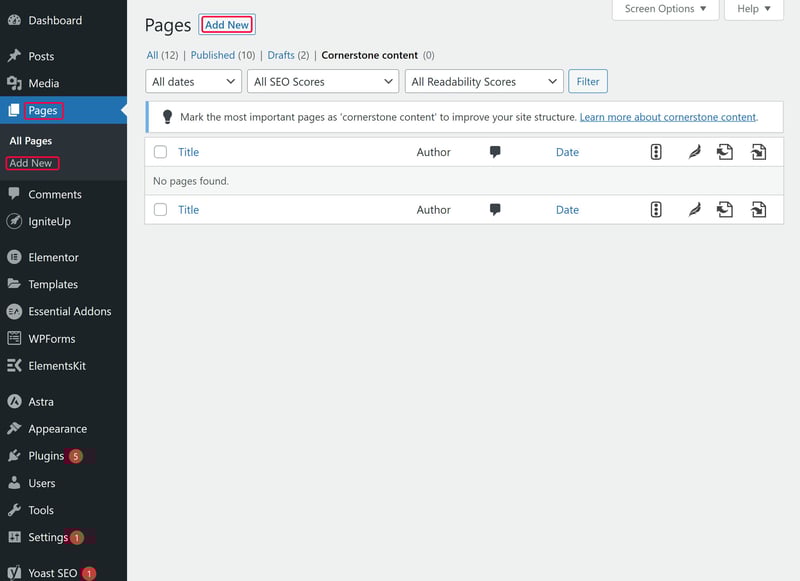
Create a blog page: First, create a special page for your blog that serves as a central directory for all your posts. Don't add any content to this page, since it only acts as an index for your posts.
- 2.
Configure reading settings: Go to “Settings” and then “Reading” in the WordPress Dashboard. There should be two options under the “Your homepage displays” heading: “Your latest posts” and “A static page (select below).” If you want a homepage with a blog section, choose “A static page (select below).” Set the “Posts page” to the page you created for your blog.
If you select “Your latest posts”, your website’s homepage will immediately show the latest blog posts – and nothing else. - 3.
Save changes: After making these adjustments, save the changes. Now, all posts will automatically appear on the blog page you've specified; you don’t need to manually assign posts to a page.
- 4.
Write and organize posts: Now that you have a blog page, you can start working on your posts. Use the Gutenberg editor to add text, images, videos, and other elements to each post.
Step 7: Define page structure & navigation
Once you’ve added your pages, you'll need a menu to organize them. Go to Appearance > Menus, give the menu a name, and set it as the “Primary Menu.”
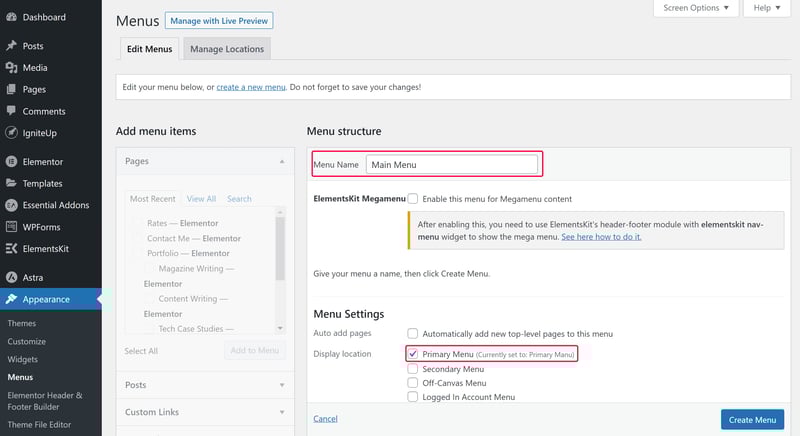
Your blog's website needs a menu.
We’ve prepared a more detailed step-by-step guide to WordPress for you here:

Writing Blog Posts
Finally, the fun part: Once your blog's website is set up, designed, and accessible under your registered domain, you can start blogging!
After all these instructions, we don't want to keep you from writing any longer. After all, blogs thrive on authenticity, and yours should reflect your unique personality and style.
Still, here are a few tips to help you make your articles more effective and attract more readers:
Start with your readers
Understand who you’re writing for and what interests them. Create content that offers value and directly addresses your readers’ needs and interests. Our SERP Analyzer can help you understand readers’ search intent and structure your articles accordingly.Think about structure
A well-structured post is easier to read and more engaging. Divide your content into clear, logical sections with subheadings to guide your readers through your article.Grab attention with a strong headline
Your headline is the first thing visitors see. Make it clear, concise, and interesting enough to draw them in. If you struggle with headlines, AI text generators can help spark inspiration.Use keywords (but don’t overdo it)
Keywords help your posts get found in search engines, but don’t overdo it. Good writing naturally includes important keywords. Focus on creating content that feels natural and answers the search intent.Get to the point
Make your points clearly and avoid unnecessary details to keep your readers’ attention.Break up text
Long blocks of text can be tiring to read. Break up your content with images, graphics, and other visual elements. Use design tools like Canva, stock photo platforms such as Depositphotos, or AI image generators. Even simple lists or tables can provide a nice visual break.Cite reliable sources
Enhance your credibility by linking to reliable sources. This shows that your information is well-researched and trustworthy.Encourage interaction
Encourage readers to interact with your content through comments and discussions. This can increase your blog’s visibility and help build a loyal community.
Next Steps: What’s Next for Your Blog?
Running a successful blog is a continuous challenge. You need to regularly publish new articles, stay on top of trends, and maintain a positive relationship with your community. If you also want to make money from your blog, it can quickly become a time-consuming part-time or full-time job.
Here are some tips on how to professionally and effectively manage your blog:
Plan Your Posts
Consistently delivering high-quality content is key to building and maintaining a loyal readership. This is easier if you have a professional workflow. A well-structured editorial calendar can help you plan topics and ensure that new content goes live regularly.
It doesn’t have to be a rigid calendar with strict deadlines. Even a simple to-do list or a flexible planning tool can help structure your blogging activities.

Plan your content with project management tools.
A good project management tool can help with all this: Use it to add tasks, track progress, and clearly define your priorities.
We’ve reviewed eleven popular project management tools. Many of them have free versions that support simple to-do lists and calendars:

Promote Your Blog
Even the best content is useless if no one finds it. With hundreds of millions of blogs on the Internet, you can't expect your blog to attract readers on its own.
You can actively promote your blog on different channels:
Social media: Share your posts on social media platforms like Facebook, X (Twitter), Instagram, and LinkedIn. Engage actively in relevant groups and discussions to increase your visibility.
Email marketing: Compile an email list and send regular newsletters to inform subscribers about new posts and promotions.
Guest posts and collaborations: Try to get guest articles on other blogs or websites, and invite bloggers to write on yours. This can increase the reach for both parties.
Monetize Your Blog
If you want to earn income from your blog, there are several ways to do this:
- 1.
Advertisements: Use ad networks like Google AdSense, Ezoic, or Raptive to earn money from clicks or impressions.
- 2.
Affiliate marketing: Link to products or services and earn a commission whenever they're purchased or clicked. Some affiliate networks include Amazon Associates, CJ, or impact.com.
- 3.
Memberships: If you offer high-quality content and have a loyal readership, you can create a members-only area where premium content is accessible for a subscription fee.
You can also combine different approaches to diversify your income streams.

Conclusion
Starting a blog is easy. If you already know what you want to write about, all you need is an account on a blogging platform (like WordPress with hosting or website builders like Wix), a catchy name (plus a domain), and a well-designed website to share your thoughts with the world.
Most blogs don’t fail because of technical issues but due to a lack of commitment. Running a successful blog requires a lot of work. You need to regularly provide your readers with high-quality, original content while managing everything else, from SEO to monetization.
Plan your blog carefully from the start, set clear goals, and always remember that good content is the key to long-term success. Anyone can start a blog, but only a few can sustain a successful one over the long term. Good luck!
Frequently Asked Questions
Starting a blog is easy. You just need enough ideas for blog posts and a platform to publish them on. If you use publishing platforms like Medium or Substack, you can immediately start writing. If you want to run your blog on your own website, for example with a website builder or your own hosting, you need to design your website's interface and connect it with a domain.
Yes, you can earn money with a blog through ads, affiliate marketing, sponsored posts, or membership areas. To generate significant income from blogging, your posts need to regularly attract high numbers of visitors.
Startup costs for a blog depend on the platform you use. Solutions like Medium or Substack are generally free but take a share of your earnings. Website builders and hosting services charge a monthly fee. The cheapest plans cost around $10 per month and should be sufficient for simple blogs.