How to Start a Successful Travel Blog in 2025
Even in the age of social media, thousands of people still write travel blogs that captivate readers with their experiences.
If you want to share your globe-hopping with the world, all you need is motivation to write and the right software. We'll show you two options and let you know what the keys are to a successful travel blog.
Finding the Right Topic: The Basis for Your Travel Blog
Do you collect frequent flyer miles, explore the world in your RV, or love discovering new places? Would you like to share your experiences with others?
You're not alone: There are thousands of travel bloggers all over the web. However, with so much competition, it's hard to stand out let alone make money with a travel blog.
To build a loyal readership, start by thinking about what you'd like to focus on. Posting one week about a hike through snowy mountains and the next about luxury hotels in the Caribbean won't work well, since you won't be able to attract a specific audience.
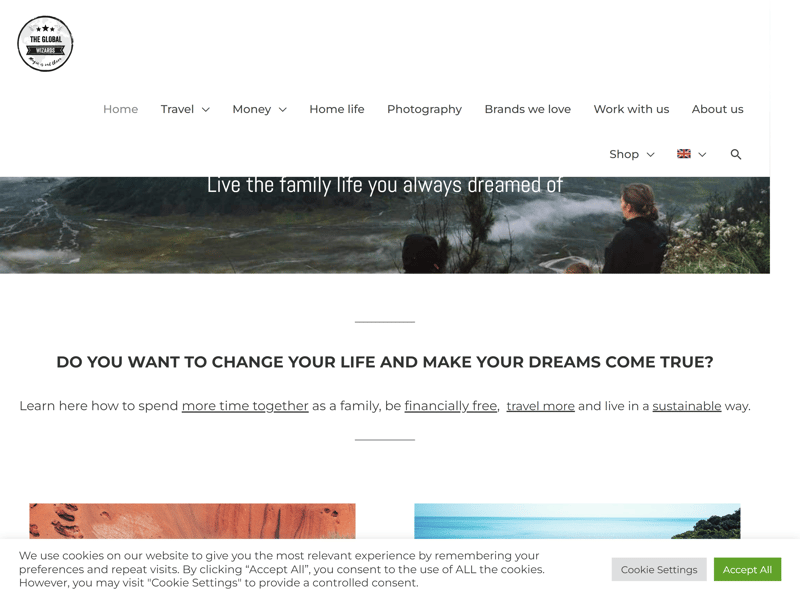
This family writes about traveling with kids and has found an interesting niche.
The most successful travel blogs focus on specific types of travelers, destinations, or traveling. For the first, these include blogs by and for solo female voyagers, families with children, or pet owners.
If the second category is more appealing, you can focus on a specific region or country. For example, some travel blogs about Southeast Asia or Africa are very popular.
Another option is to blog about types of traveling, such as RV, backpacking, gastro-tourism, or cruises. The most important thing is to stay authentic. Ask yourself these questions when you start:
What makes my trips special?
What matters most to me when I travel?
Who exactly do I want to reach?
Your Own Travel Blog: Website Builder or WordPress?
Once you've got the idea for your travel blog, you'll need software to bring it to life. The most popular travel blogging platforms include website builders like Wix and content management systems like WordPress.
Let's look at the pros and cons of both options.
Creating a Travel Blog With a Website Builder
Thanks to website builders, blog owners no longer need to deal with HTML code. These allow anyone, even those without coding skills, to easily create a website from ready-made elements like menus, boxes, photo galleries, and text blocks.
In the editor, you'll be able to quickly add elements and adjust colors, sizes, and fonts. Because of the WYSIWYG principle (what you see is what you get), you can instantly see how each change you make affects your blog's look and appearance.
There are different types of website builders for various target groups. We like to split them into four categories:
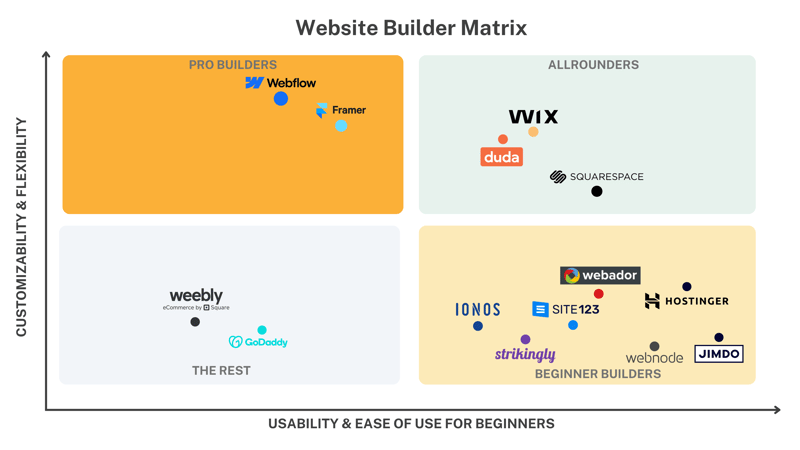
Most website builders are designed for complete beginners.
- 1.
Quick starters are very beginner-friendly website builders that help you get good results fast, but limit your design options.
- 2.
All-rounders offer a good mix of simplicity and flexibility. They come with more design options and free drag-and-drop editors that beginners can easily master with a bit of practice.
- 3.
Pro builders are made for experienced users who understand web design basics and want to create complex designs without having to code.
- 4.
Gap fillers are website builders that aren't particularly user-friendly or flexible.
Blog Features: Each Website Builder Is Different
Almost all website builders support blogging. Usually, blog management happens in a separate panel or area where you can manage existing posts and create new ones. Of course, you'll also get an editor with common formatting tools to write and shape your articles according to your preferences.
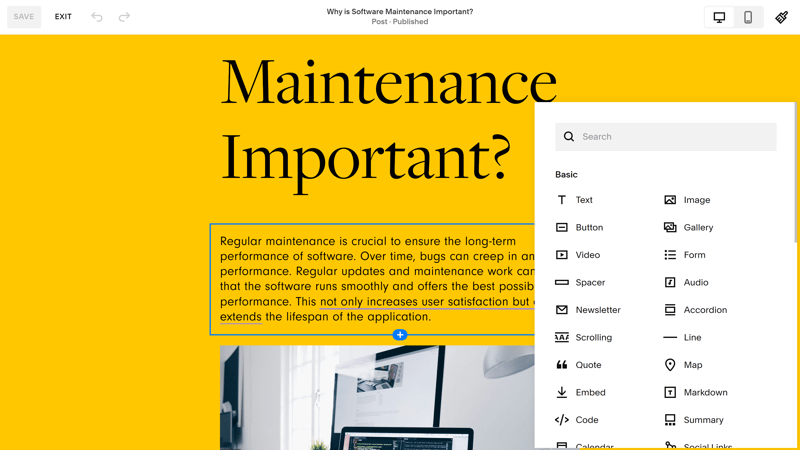
Website builders offer editors for formatting and preparing your blog posts for publication.
Features do vary from platform to platform. Some website builders let you manage authors and assign articles to different editors. Other platforms even have built-in monetization options for blogs.
Website Builder Costs
Some website builders let you create a blog for free. However, there are a few catches: you'll have to park your blog on an unattractive provider domain and put up with ads.
If you want to run a professional travel blog on a custom domain, you'll need to spend at least $5-10 per month - which is how much the cheapest website builders in our comparison cost.
Pros and Cons of Website Builders
plenty of unique templates and features
hosting, domain, and editor all in one place + automatic updates
no technical knowledge required
extra apps in the app market (depends on the provider)
easy to use
quality of features and editors vary
usually not free/free plans have limited options
little technical control
Creating a Travel Blog With WordPress
A content management system (CMS) is a platform that lets you create and manage website content. WordPress is by far the most popular CMS, powering 43 percent of all websites worldwide.
At first glance, WordPress and website builders seem similar since both let you create websites without having to code. However, after downloading WordPress' free, open-source software, it's up to you to get your website online by organizing hosting and domain registration.
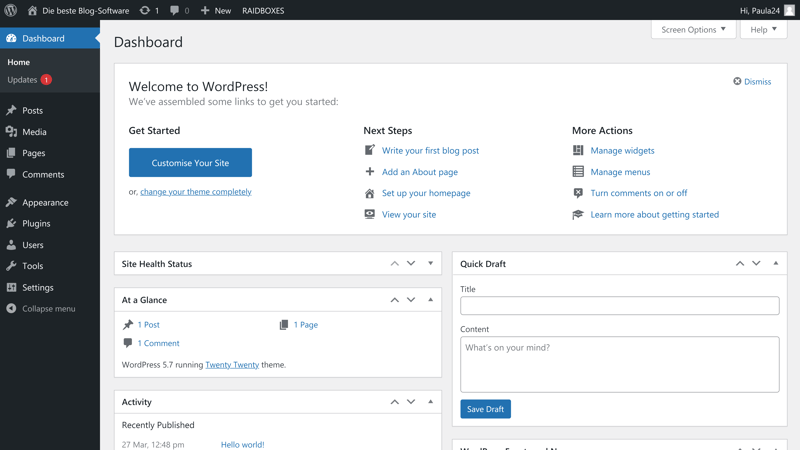
Like Wix, WordPress offers users a versatile and user-friendly interface.
The upside: You get much more control over your website's technical settings and aren't tied to a single commercial provider and their features. With WordPress, almost anything is possible – and there are countless plugins that add more features.
The downside: You need to be more hands-on and take care of things that website builders include in their packages (like security or backups). WordPress might be too much of a good thing if you only want to publish posts on your travel blog and don't need advanced technical features.
Pros and Cons of WordPress
much more flexible than website builders
lots of templates and features
thousands of plugins
large community for support and technical help
open-source and free-to-use
web hosting must be arranged separately
requires more technical know-how
more time-consuming
How to Create a Travel Blog With Wix in 6 Steps
Website builder or CMS? The choice is entirely up to you.
Many travel bloggers start with website builders since they're simple to use and can be tried out for free. You can upgrade to a paid, ad-free plan with a custom domain at any time without losing your content.
In the following sections, we'll show you how to set up a travel blog and create your first post with Wix, our top-rated website builder.
1. Create an Account

Go to Wix's website*. To sign up, you only need to provide an email address. Wix will then ask what kind of website you want to create (personal or business) and suggest blog categories. Look for the "Travel Blog" option.
Wix now even offers an AI website assistant that can help you set up your travel blog:

Wix guides you through creating your website by providing designs that match the category you've chosen.
2. Choose a Template
Next, pick a template. This serves as the visual framework for your travel blog. Luckily, Wix offers several templates specifically designed for this purpose. You can also use other templates and customize them to fit your needs.
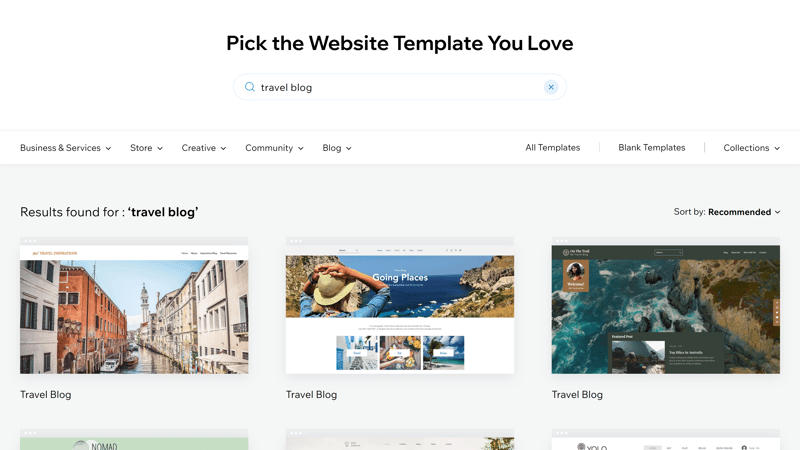
Wix offers more than 800 templates, including several travel blog options.
3. Customize Your Template
Now you can edit the template using Wix's editor. Add pages, adjust global design settings like colors and fonts, and integrate text and image content.
If you choose a template without a blog, you'll need to add a blog page in order to get your posts online.
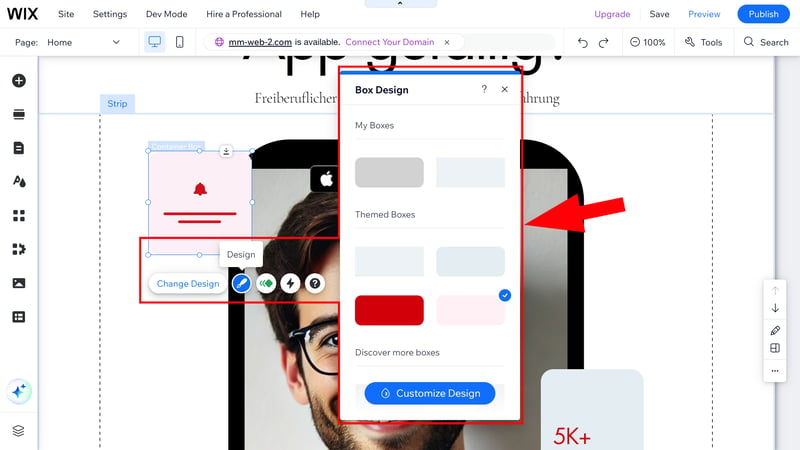
Add and remove pages in the editor.
Wix's editor is fairly extensive and includes many features. Take some time to get familiar with these. Here's a detailed guide with screenshots that explains the most important steps:
4. Create Your First Post
You won't manage your blog posts directly in Wix's website editor but through its main dashboard. There you'll find all the features you need to run your blog.
Click "+ Create New Post" to start writing your first blog article.
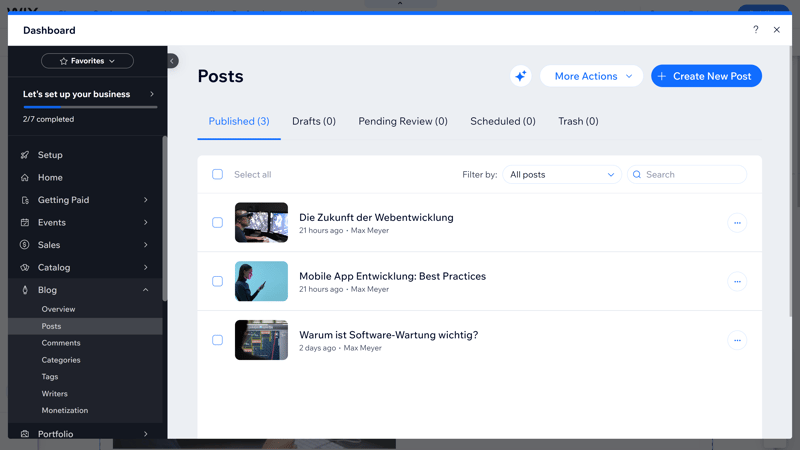
Create your first article.
5. Add Content
In Wix's blog editor, you're able to write posts and drag and drop elements onto the page, just like in the software's website editor. You can add images, GIFs, videos, galleries, tables, polls, and more. It's also possible to insert custom HTML code.
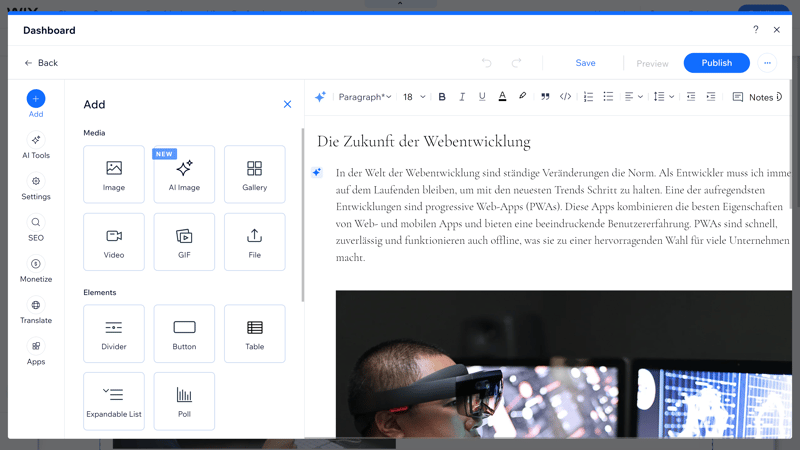
Write your posts and add elements in Wix's blog post editor.
6. Publish
Once you're finished writing and formatting your first post, click Publish in the top right. You can also save a draft or schedule content to go live later. Published posts can be edited or deleted at any time.
Get More Readers: Social Media and SEO
Even the best travel blog is useless if its target audience can't find it on Google or social media. Where content appears in search engine results depends on SEO factors. On Twitter and Instagram, you'll get attention with relevant hashtags and stunning images.
With that in mind, we'll show you how to optimize your travel blog for social media and SEO.
SEO Optimization
SEO stands for search engine optimization and describes methods to improve a website's visibility in organic search results on search engines like Google.
While Google's algorithm is secret, certain practices have proven successful in improving rankings:
Focus on keywords
Free keyword tools like Ubersuggest help you find keywords with the highest search volume and show related keywords. When you naturally include these words in your text, meta descriptions, and headers, you'll move up in Google's rankings.Add quality internal and external links
Linking to your older blog posts or relevant external websites will boost your authority. Make sure all links are working.Optimize technical factors
If your blog loads too slowly, Google will penalize it. As if that wasn't bad enough, visitors are also more likely to leave. Make sure that your Time to First Byte, Cumulative Layout Shift, and Largest Contentful Paint meet the recommended values.Content is king
Even with fast-loading pages and keyword optimization, your blog won't rank highly if its content is boring or copied. Write unique and exciting travel stories, and both Google and your readers will reward you.
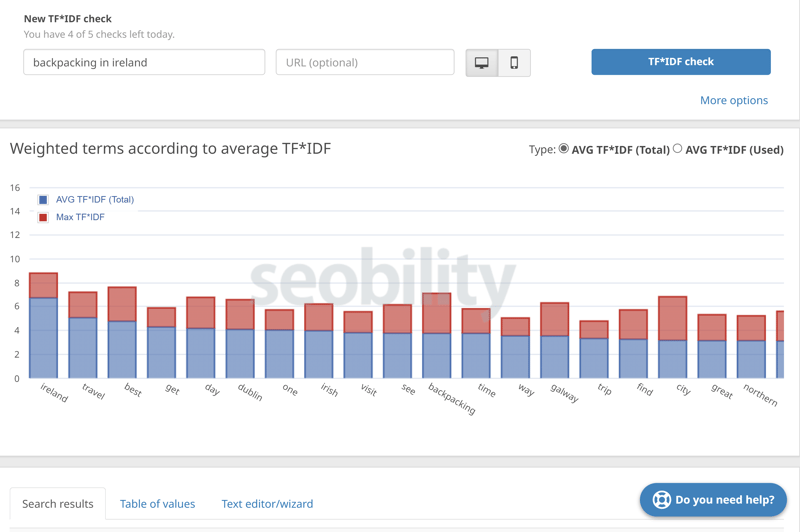
A WDF-IDF analysis helps you find keywords that matter to Google.
Many website builders offer SEO assistants that help optimize your blog for search engines. For example, Wix's App Market has many apps that check your blog's conformity to SEO best practices. WordPress offers even more options with countless SEO plugins like Yoast.
Social Media to Increase Your Reach
Both website builders and WordPress let you automatically share your posts on social networks to reach a wider audience. Platforms like Facebook, Instagram, Twitter, or TikTok make it possible to reach thousands of users with a single post.
But your content can easily get lost in the daily flood of digital information. Here's how to stand out:
Harness the power of images and videos
Use stunning images and videos from your travels. High-quality photos are attention-grabbing, especially on Instagram. For that reason, many travel bloggers invest in a good camera or high-end smartphone.Add sharing buttons
Include social media buttons under each post so readers can easily share what you publish.Use hashtags
Adding relevant hashtags increases your reach. Pay attention to current trends, especially on Twitter.Connect with like-minded people
Join and post in groups that match your travel blog's content on platforms like Facebook, Quora, or Reddit to expand your audience.
Conclusion
Before starting your travel blog, pick a clear topic to focus on. This will help shape your content and target audience.
Next comes the technical part: Different platforms are available depending on your skills and needs. WordPress, a CMS, offers maximum flexibility and custom design options, while website builders like Wix provide easy handling and built-in hosting, which saves time and effort.
To increase your reach, embrace SEO best practices and use social networks to spread your content. If your articles are engaging, authentic, and published regularly, chances are good that you'll be able to build a loyal readership and make your blog successful in the long run.
Frequently Asked Questions & Answers
There are several platforms for creating a travel blog, and the best choice depends on your technical skills and needs.
WordPress offers maximum flexibility and customization options but requires technical know-how and hosting. Website builders like Wix, Squarespace, or Strikingly are easier to use and offer an all-in-one solution providing everything from design templates to hosting to domain registration.
For beginners and smaller travel blogs, specialized blogging platforms like Medium or Blogger are very easy to use but offer fewer customization options.
Website builder subscriptions come with much more than blogging software, also offering a domain and web hosting. This means you don't need to purchase either separately or worry about things like security updates.
However, this convenience comes with some limits: Both design options and features are more restricted compared to a flexible CMS like WordPress.
One of the best website builders for travel blogs is Wix. Besides its templates and designs for travel blogs, the platform offers a free plan with a subdomain that's great for beginners. Other popular builders with blog features include Squarespace and Webflow. Even simpler but with fewer features are beginner-friendly options like Strikingly or SITE123.


