Create a Website with Framer 2025: The Fastest Way to a Framer Website
Website builders aren't for real designers? That's generally true – but not for all builders. Framer is a website builder specifically designed for designers. It offers much more creative freedom than Wix and similar tools, but it's also significantly more complex.
We explain Framer's interface and basics, then guide you step by step on how to create a website using this design platform.
Guide: Create a Website with Framer
Framer is a complex, versatile design platform with countless features and settings. If you want to truly master and fully understand the platform, it's best to visit the Framer Academy, the provider's learning platform. In this article, we only cover the essential basics to get you started.
Create an Account and Start a Project
First, you need a Framer account. Setting it up takes just a few seconds – and since Framer offers a free plan with ads and a Framer domain for hobby websites, no payment details are required initially.
You can either sign up with your Google account or provide an email address and follow the activation link:
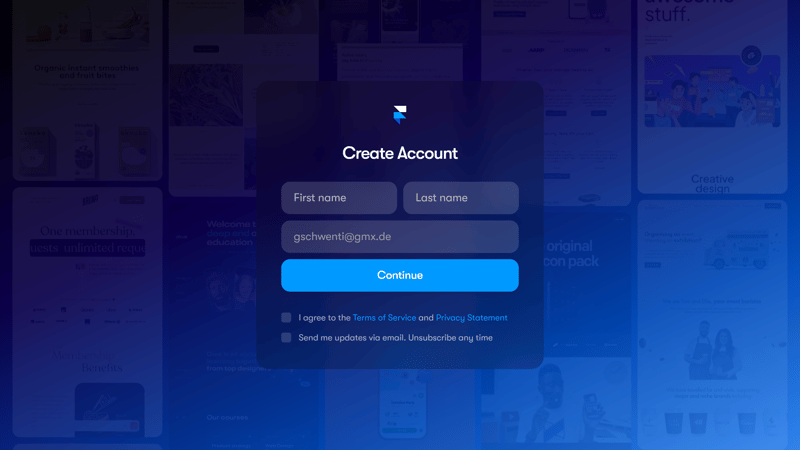
A Framer account is generally free.
After signing up, you'll land on the Framer dashboard, where you can find your projects and settings. Click “New Project” in the top right to start a new website.
This way, you start with a completely blank page. We explain how to create a website based on a design template in Step 3.
Understanding the Framer User Interface
First, take some time to understand the user interface and the concept of the Framer editor. It is much more complex than the editors of beginner-friendly builders.
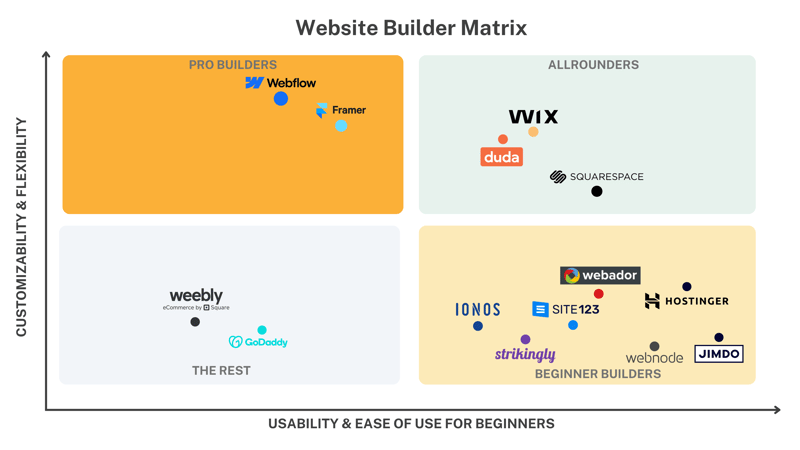
Framer is a website builder for advanced users and professionals.
Interface Basics of Framer
If you have little experience with web design or design tools like Figma, it might take some time to get the hang of it. Take it step by step and start by getting familiar with the interface, which is divided into five areas:
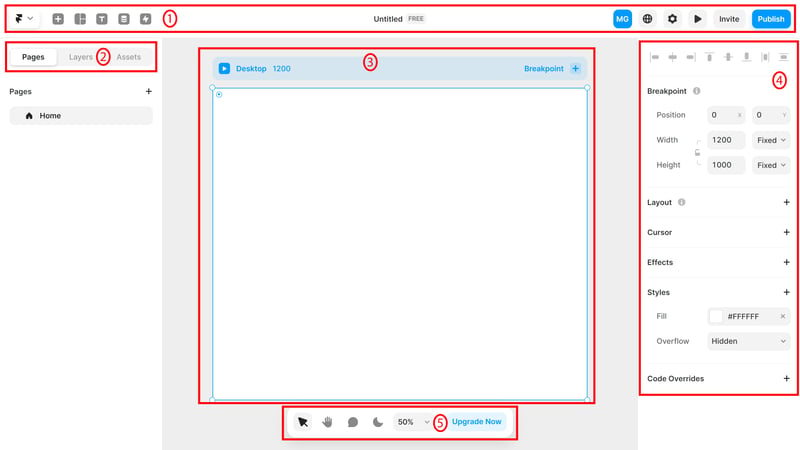
The Framer interface.
- 1.
Toolbar: The top bar contains the main tools and features you can use to edit your website. Clicking the Framer icon on the far left opens the dropdown main menu with various actions. Next to it are buttons for elements, layouts, text, CMS, and quick actions. On the far right, you'll find the website preview, settings, and the “Publish” button.
- 2.
Sidebar: The sidebar lets you switch between three aspects of your website: pages, layers, and assets. In the Pages tab, you can see all your website pages and add new ones. Each page is divided into different layers, like text or image layers, which are listed in order in the Layers tab. The Assets tab contains components, which are modular elements like buttons that you can design once and reuse.
- 3.
Canvas: The center of the screen is the canvas. Here, you design your website in a frontend-like environment.
- 4.
Properties: The properties panel is docked on the right. It is context-based and shows different properties (e.g., position, layout, effects, styles) depending on the element you have selected.
- 5.
Canvas Tools: The bottom toolbar lets you switch between selection and pan modes, leave comments, enable dark mode, and adjust zoom settings.
You'll likely get the hang of the details through hands-on practice. Start by adding some pages, layers, and elements to explore the features and possibilities.
Since the Framer interface is quite complex and has different modes you frequently switch between while designing, it's helpful to learn some useful shortcuts. For starters, these are important:
[Space] + [Left Mouse Button]: Press the spacebar to pan across the canvas with a mouse click without constantly switching between selection and pan modes.
[Ctrl] + [+] or [-]: Quickly zoom in or out.
[Z] + [Left Mouse Button]: Quickly zoom into a specific area by pressing Z and selecting an area with your mouse to enlarge it.
Layout and Design Basics
Before we start designing our website, let's talk a bit about Framer's general layout and design concept.
You mainly design your website in the Layers tab:
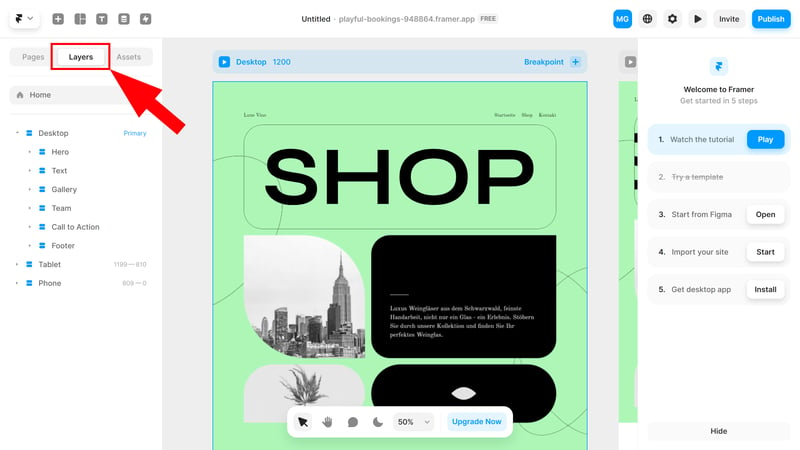
In the Layers tab, you can see the layers of your website.
On the left, you'll find the individual layers of your website listed. Framer automatically groups them. For example, if you create a button by adding text inside a frame, the text will automatically be nested under the frame.
A Frame is simply a type of container that can hold various elements. Besides basic frames, there are also Stacks, which are combinations of frames with extra settings to control the direction and position of the elements inside. Examples include Rows, Columns, and Grids.
To add a new frame or other elements, click the Layout button in the toolbar, select the element, and place it on the page.
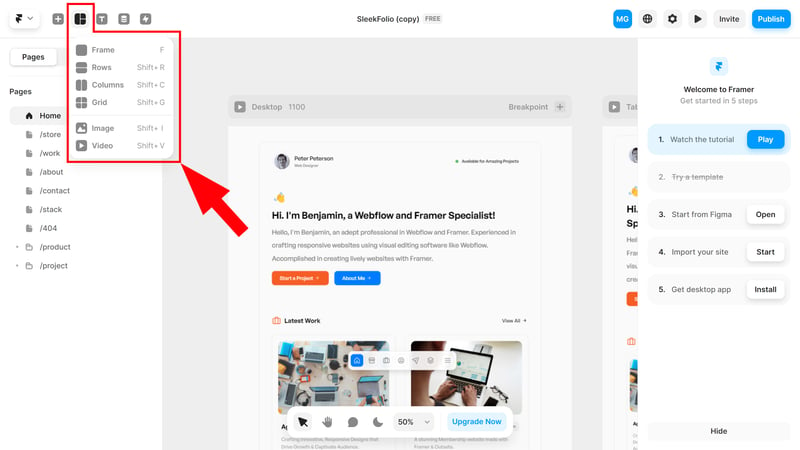
Frames are containers that hold elements like images or text.
You can now edit and customize every frame and element in many ways. This is mainly done through the properties panel on the right, which we’ve already introduced. However, some settings can also be quickly accessed via right-click or shortcut.
For example, if we right-click on our button, we can select 'Fit Content' to make the text automatically adjust to the frame. Then, we can fine-tune the spacing and design in the properties panel.
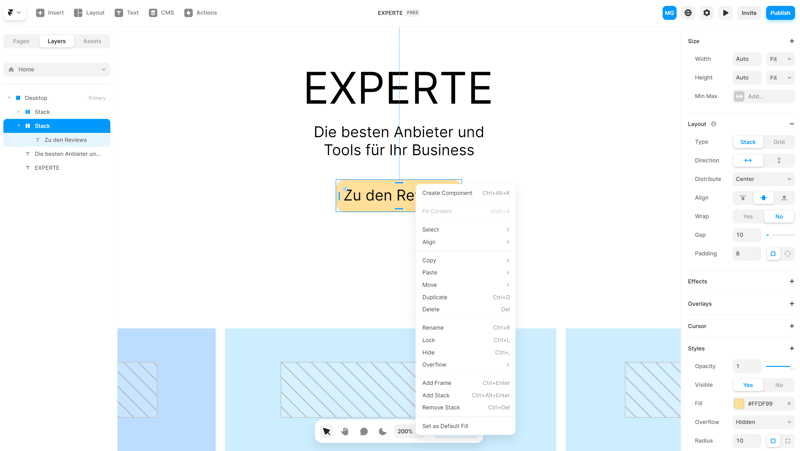
There are countless design settings for every element.
Every Framer website is a combination of layers, frames, and stacks that you can freely arrange and edit. But luckily, you don’t have to start from scratch – Framer also offers templates.
Option 1: Choose a Template
Most website builders provide design templates for different industries and purposes. You just need to customize them with the editor tools and fill them with your content.
Framer also offers templates, though they work a bit differently. These aren’t standard design templates created by Framer but user-generated websites that you can duplicate, use, or further edit.
The difference from traditional templates might seem minor at first, but it has some implications. For example, with Framer, you can't simply create a new page that automatically adopts your template's design. You can only copy an existing page and adjust the content.
On the other hand, the selection of templates is larger and more practical because they are real websites created by users. Most templates are well-designed and include unique elements and effects you won't find with Squarespace and similar platforms.
You can browse the available templates on the Framer website under “Resources”:
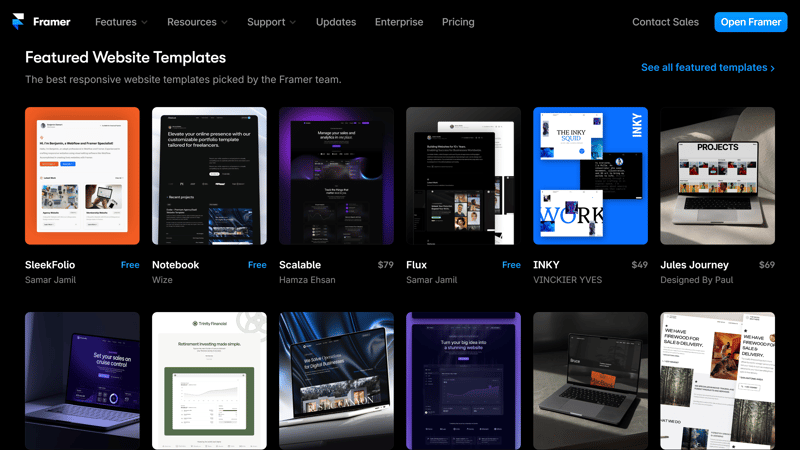
Framer offers hundreds of free and paid templates created by users.
Each template has its own page with a short description and a list of pages and features. You can also open a live preview to see the website in action. If you like what you see, click the blue button to duplicate the website in your dashboard.
Some templates are free to use, while others require a one-time purchase:
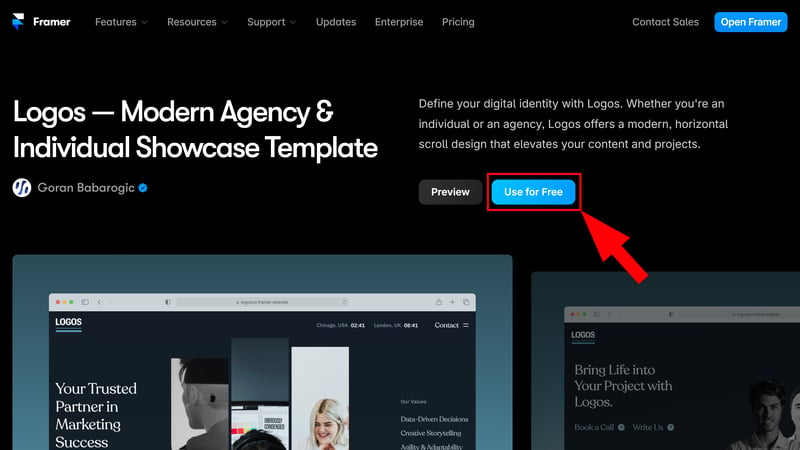
Add the template to your dashboard.
Once you've activated or purchased a template, it will appear in your dashboard. Just click on it to open and customize it in the Framer editor.
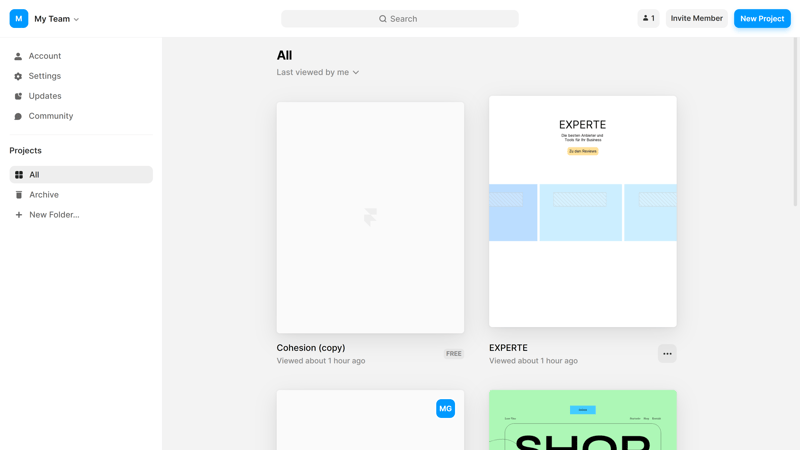
Your template website appears as a duplicate in your dashboard.
Option 2: Create a Website with AI
There’s another way to create a website without building it entirely yourself: Framer’s integrated AI assistant. You can find it in the quick actions under “Generate Page.”
If you want a truly well-designed website, it's better to use a human-made design template (or create your website entirely on your own using Framer's tools).
Customize Content
Now you either have an empty project, a template duplicate, or an AI-generated website. Next, you need to customize the content to make your website unique and relevant to your needs.
Framer is so powerful that we can't cover all its features and settings. Here are some basic steps and tips to help you adjust the most important content:
Add and Edit Text
Add Text: Click on the text tool in the toolbar and drag a text box onto the workspace. Then, you can enter the text you want.
Text Formatting: Use the properties panel to change the font, size, color, and other text styles. You can also adjust spacing and alignment here.
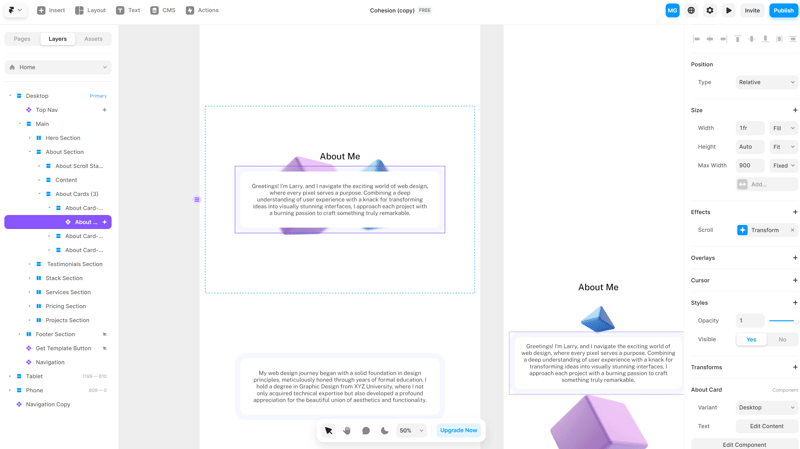
Text and text formatting in Framer.
Add Images, Media, and Other Elements
Add Images and Videos: Use the layout button to add images and videos. You can place them directly on the page or within a frame.
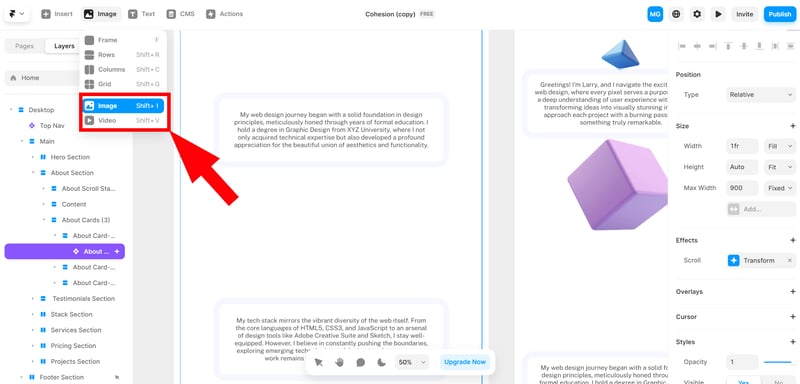
Add images and videos to your website.
Adjust Image Properties: Edit the image in the properties panel. You can resize it, add effects, and adjust its position.
Embed Elements: Find additional media and other elements, such as forms, icons, slideshows, social media integrations, and more in the “Insert” menu.
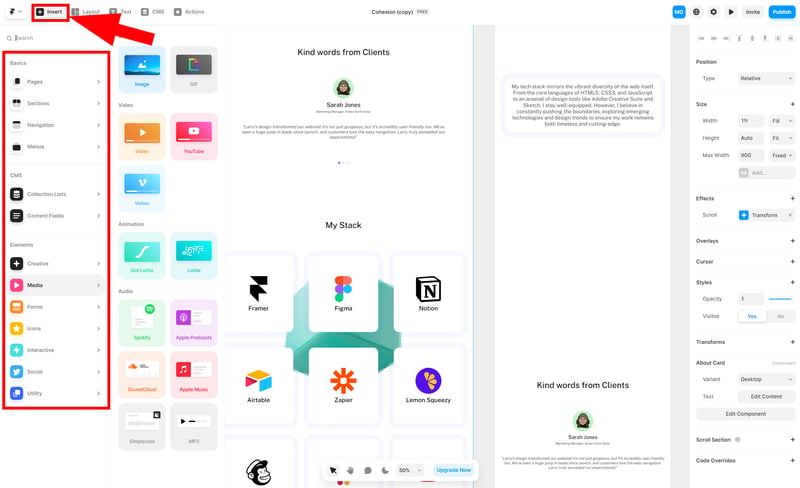
The “Insert” menu provides a list of available elements.
Add Pages, Sections, and Menus
Add New Pages: Go to the Pages tab in the sidebar to add new pages.
Add Sections: Find pre-designed sections to build your pages in the “Insert” menu under “Sections” in the sidebar. The selection is limited but covers essential content, from hero areas and feature lists to testimonials, contact forms, and pricing tables.
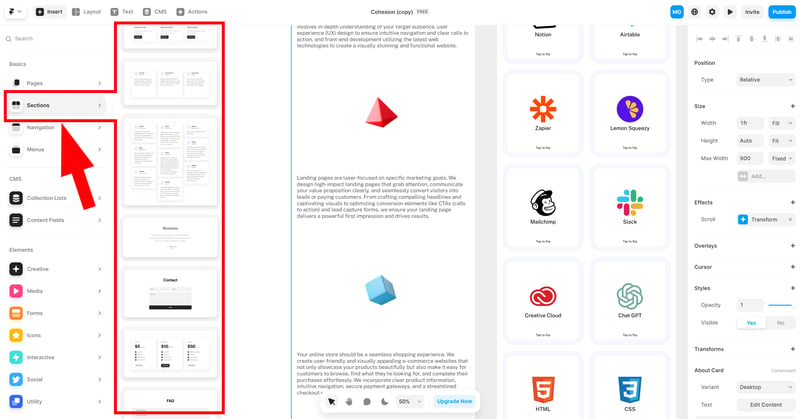
You can build your pages using pre-designed sections.
Customize Navigation Menus
Add Navigation Menu: Under “Insert” > “Navigation,” you’ll find the available navigation menus you can add to your website.
Set Links: In the properties panel, you can customize the links in the navigation menus. Link them to the relevant pages or sections of your website.
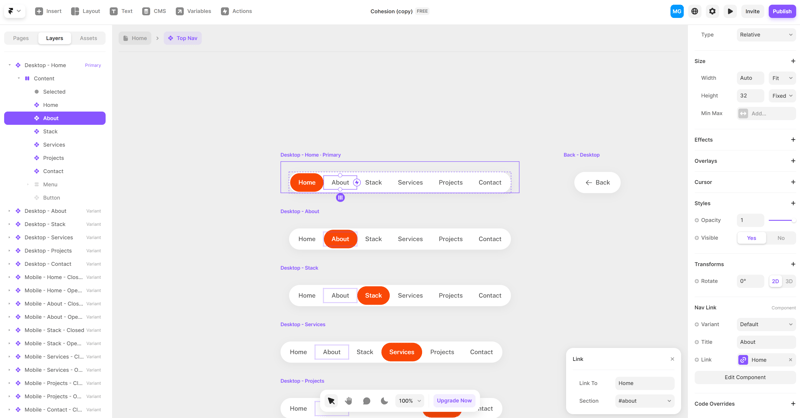
Edit the navigation menu of your website.
Responsive Design with Breakpoints
Your website should look good not only on laptops and desktops but also on smartphones and tablets. Framer enables responsive design through what are called breakpoints.
Different formats are displayed side by side, so you can instantly see how the same design looks on various devices:
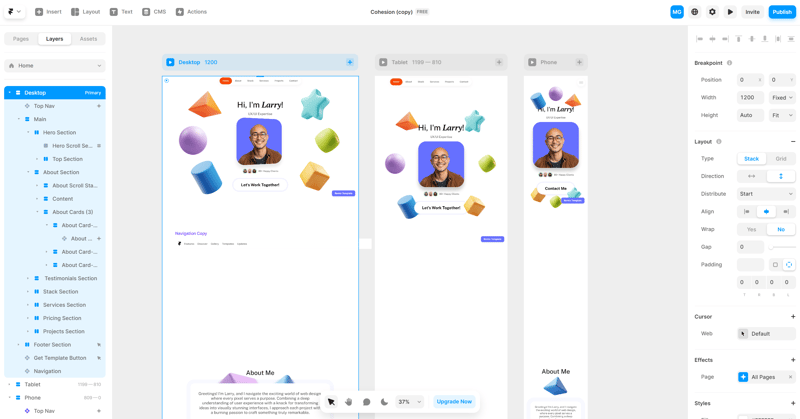
Make your Framer website mobile-friendly.
You can adjust the content and design for each breakpoint individually to ensure the best display on all device types.
Publish Your Website
Once you're happy with your website, all that's left is to publish it. Before doing so, use the preview feature to check if all elements are displayed correctly and if all links, effects, and designs work as intended.
If everything looks good, click the “Publish” button in the top right corner:
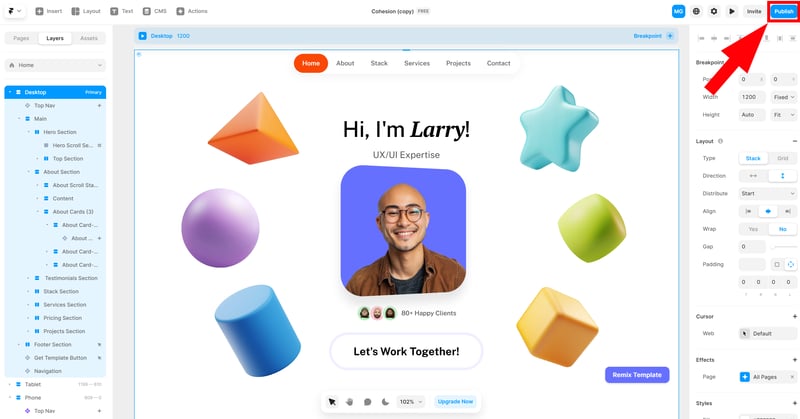
Publish your Framer website.
Your website will first be published on a Framer subdomain. However, you can connect it to a custom domain in the site settings. This feature is only available with a paid Framer subscription.
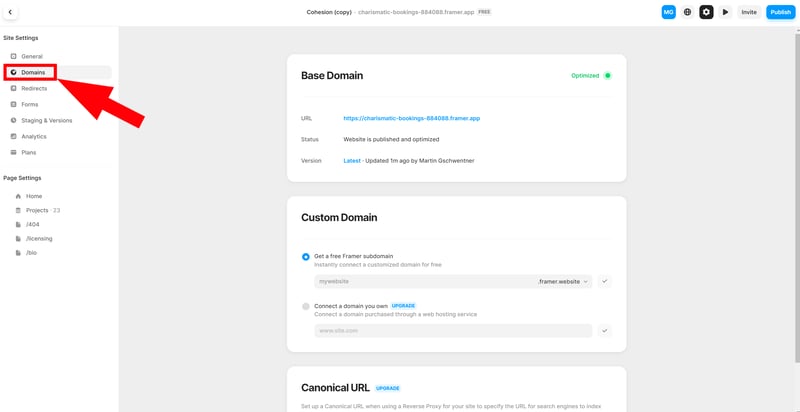
A custom domain is only available for paying customers.
Congratulations! Your Framer website is now live and ready for its first visitors! You’ll probably notice small details that aren’t quite right yet. Framer is also a powerful design tool that takes time to fully understand, so you might not achieve your desired result on the first try.
If you want to dive deeper, you should visit the Framer Academy. There, you’ll find detailed tutorial videos on almost all the platform’s key features.
Conclusion
Framer is a powerful no-code design platform that lets you create truly unique and visually impressive websites—unlike most traditional website builders. However, this creative freedom comes with a steep learning curve and added complexity, making Framer especially appealing to advanced users and professionals.
Prefer a simpler solution? In our comparison of the best website builders, you’ll find detailed reviews of 15 programs.


