Behind every successful WordPress website, there are likely a few projects that never made it off the drawing board. Even though developing and launching their first WordPress website can be challenging for beginners, it is doable!
In this guide, we'll show you how to get your WordPress website live in seven easy steps and let you know everything you'll need to do it.
Publish a WordPress Website
WordPress is the driving force behind many successful websites. Your web project could be next, but only if you don't get discouraged and give up prior to launch.
To ensure that doesn't happen, we'll walk you through every step of developing and publishing your very own WordPress website.
Choose a Hoster
If WordPress is the foundation of your website, then web hosting is the plot of digital real estate that it's built on. Without hosting, your website won't have any web space, preventing it from being published and made accessible to others.
EXPERTE.com's Winner: SiteGround
Thankfully, there are plenty of managed WordPress hosting services that specialize in supporting WordPress websites. We reviewed 9 of the leading options, awarding SiteGround our gold medal. The Bulgarian host offers what we feel is the best combination of performance, security, features, and user-friendliness on the market.

Keep in mind that SiteGround is just one of the 9 hosts we reviewed and there are many other excellent options. To find out more, as well as check comparisons and tutorials, have a look at our guide to WordPress hosting:
Register a Domain
The second must-have for a WordPress website is a domain or a name and Internet address unique to your website. For this, you'll have two options: Either your hosting provider will include a domain (usually for a year) with your subscription, or, you can register one yourself.
Domain Included With Hosting
Simply enter your desired domain name in the search field to check its availability: If no one has purchased it yet, add it to your cart.
Domain Not Included
In the event that your hosting provider doesn't offer a free domain as part of its subscription packages, you'll need to handle this yourself. But don't worry: It's very straightforward and inexpensive. A typical .com or .org domain should only set you back around $10 per year.
It should be possible to register or link either an existing domain that you own or a newly purchased one in your WordPress host's user dashboard. Look for the domain area, copy and paste the domain you've registered, and confirm it.
To learn more about domain costs or what to do if your first choice is already taken, have a look at our domain guide:
Install WordPress
Next up is installing WordPress to your web space. With managed WordPress hosts, this is particularly easy and only takes a few clicks.
The exact process varies from service to service: With Kinsta, click on "Create a site" in the dashboard to start the installation wizard. Next, provide some basic data about your website (page title, admin name, password) and specify the data center you would like your website to be hosted from. After that, Kinsta handles the rest.
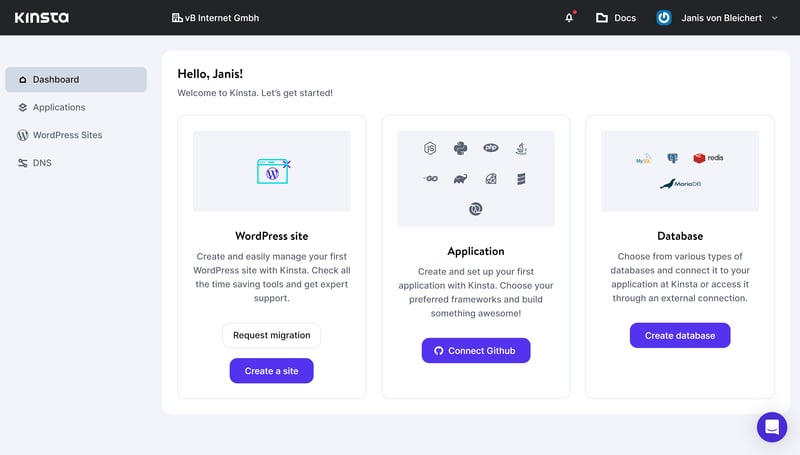
Managed hosting services make installing WordPress straightforward and nearly automatic.
Configure Your Server (Optional)
One of the many advantages managed hosting affords is that you don't need to configure and monitor your website's server settings. If you're unfamiliar with things like PHP, caching solutions, or database management, it's best to leave these to the pros.
With that said, we do recommend familiarizing yourself with your hosting provider's management backend, if only to check a few important settings that can impact your website's performance and security.
For example, it's a good idea to make sure that an SSL certificate is installed and assigned to your WordPress website. Only pages that are encrypted with SSL, easily recognizable by the HTTPS in their addresses, are secure and trustworthy. If using SiteGround, you'll find SSL options in the SSL Manager:
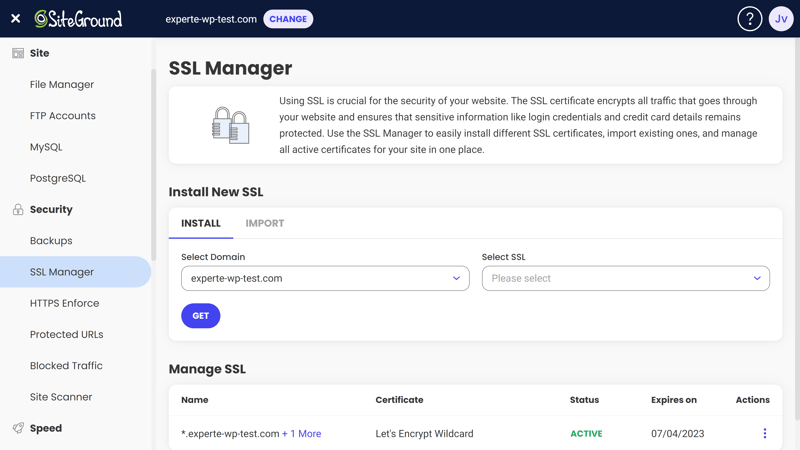
Most hosting services include free SSL certificates.
Turning to performance, make sure that server-side caching is activated. This loads content faster by temporarily storing it on servers, improving your website's user experience.
Caching features are typically enabled by default, however, it won't hurt to take a look and double-check that everything is as it should be.
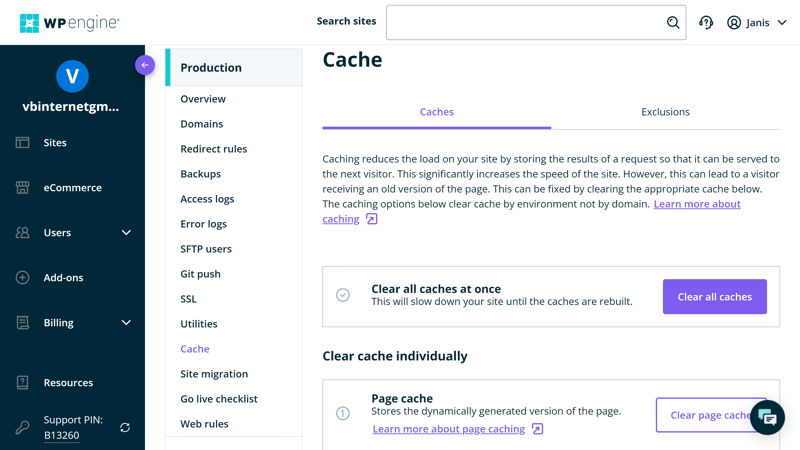
In the event that your hosting service doesn't offer integrated caching features, you'll need to install a suitable WordPress caching plugin.
There are many other configuration options and settings in your WordPress host's management backend, however, we strongly recommend only tinkering with those that you understand.
Choose a Theme and Design
You've got your plot of land, your foundation, your address, and your utility hookups - now it's time to build and decorate your digital house. In WordPress, the figurative walls, windows, and doors are determined by your WordPress theme. This is a design template that you'll use to customize the layout, color scheme, and general look of your website.
A seemingly endless number of themes, both free and premium, exist. Installing one is easy and only requires a few clicks:
Step 1: Head to Design > Themes in your WordPress website's Admin Dashboard. Themes that are already installed will be displayed here.
Step 2: Click on Add theme. You can now browse through the available themes and filter them according to different categories.
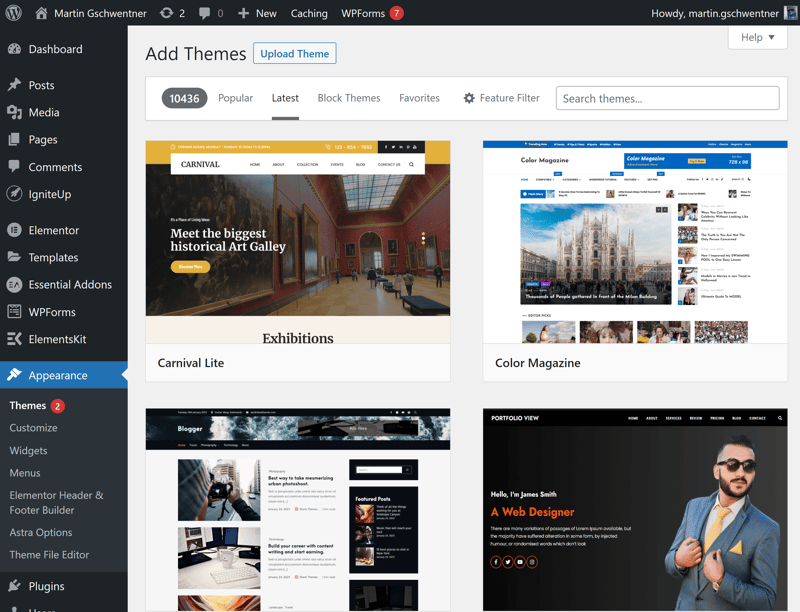
Step 3: Has something caught your eye? If so, click on the "Install" button. After that, you'll be taken to a live preview to see how the theme looks with your content and even activate it.
For your convenience, we've prepared a detailed guide that shows how to install external themes that aren't available in the WordPress marketplace. You can find it here:
Once you've decided on a theme and installed it, adjust it to your exact tastes in the Customizer (located in the Design menu). There, it's possible to modify its color scheme, menus, widgets, font(s), and a range of other design aspects. Keep in mind that the degree of customization and number of options vary from theme to theme.
Create Pages and Posts
Next up is the most interesting, but probably also most difficult part: Filling your WordPress website with content, in the form of pages and posts.
Pages: A website is a collection of pages and subpages. These are usually static and provide the basic structure for any website. To add a new page and fill it with content, go to Pages > Create. You'll then work with a straightforward editor in which you can add text, images, and other content to your page.
Posts: These are articles or other content that you arrange chronologically (by publication date) or according to other filters. Blog entries, which you can display either on your home page or a dedicated blog subpage, are the most readily recognized examples.
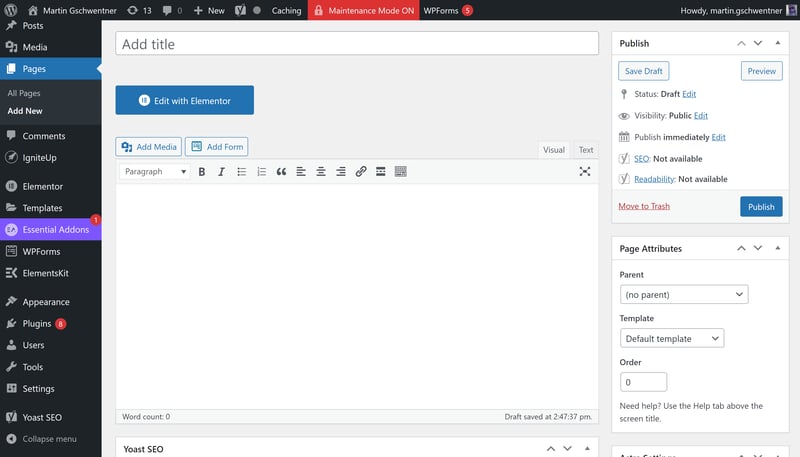
Add pages and posts to fill your website with content.
Texts, images, layout, menus: Ensuring that your website is both user-friendly and professional is an art in and of itself. Be sure to set aside enough time to familiarize yourself with WordPress's tool, and only stop tinkering when you're satisfied with the results.
Whenever you publish a page or post in WordPress, it usually goes live immediately, making it available to visitors and the general public. If you'd prefer that only your website is available, but not any of your content until you've finished designing it, you can activate maintenance mode and/or set up a "Coming Soon" page. This is easy to do with page builder plugins, like Elementor or SeedProd.
Publish Your WordPress Website
Is your WordPress website ready for the world? Then, you actually don't need to do anything else. There's no button or switch to press or click to make your website visible. Usually, WordPress puts pages and posts online as soon as you publish them in the WordPress Admin Dashboard.
If you turned on maintenance mode or set up a "coming soon" page, don't forget to deactivate it when your website is ready to go live.
Regardless of whether it comes from friends, colleagues, or your family members: If your website is important, make sure that you get honest feedback from people that weren't involved in designing it. Owing to their distance, they should be able to offer a sharper eye for any irregularities or problems and help you to create a better final product.
Conclusion
WordPress is the world's most popular content management system because it allows anyone to create virtually any kind of website. Since the first steps can be tricky, many projects never make it past the development phase. To prevent this from happening to you, divide the process into more easily manageable steps, and work on them individually.
Or maybe you've encountered a problem and don't know how to move past it? We might be able to answer your questions in our WordPress guides, tutorials, and articles:
FAQs
Whenever you click "Publish" in the editor, WordPress goes live with that page or post. There isn't a special toggle or switch for publishing an entire website. However, you can make your WordPress website invisible to visitors until you've finished setting it up by turning on maintenance mode with the help of a plugin.
Yes, WordPress is good for beginners since no programming or design know-how is needed to create a WordPress website with it. Managing the technical aspects of your site as well as its content isn't complicated, especially since beginners can consult tutorials and familiarize themselves with WordPress and its features.
Depending on the host your select and your requirements, hosting a WordPress website can cost anywhere from $3-$30 per month. However, these costs aren't for WordPress itself, but for web hosting and a domain. There are free options, however, the features they include are severely limited, which only makes them an option for private or hobby websites.


